


TIPS
How Much Water is Enough?
With water becoming a scarce and costly commodity in some areas, many vegetable gardeners might wonder just how much water plants really need.
In areas without drought, a common mistake new gardeners make is watering too much!
To address the big watering question, below is a chart that tells you critical times to water each vegetable crop as well as the number of… gallons of water needed.
Of course, these guidelines assume that you have rich, well-balanced soil. Increase frequency during hot, dry periods.
Vegetable Critical time(s) to water for a 5-foot row Number of gallons of water needed
Beans When flowers form and during pod-forming and picking 2 per week depending on rainfall
Beets Before soil gets bone-dry 1 at early stage; 2 every 2 weeks
Broccoli Don’t let soil dry out for 4 weeks after transplanting. 1 to 1 1/2 per week
Brussels sprouts Don’t let soil dry out for 4 weeks after transplanting. 1 to 1 1/2 per week
Cabbage Water frequently in dry weather for best crop 2 per week
Carrots Before soil gets bone-dry 1 at early stage; 2 every 2 weeks as roots mature
Cauliflower Water frequently for best crop. 2 per week
Celery Water frequently for best crop. 2 per week
Corn When tassels form and when cobs swell 2 at important stages (left)
Cucumbers Water frequently for best crop. 1 per week
Lettuce/Spinach Water frequently for best crop. 2 per week
Onions In dry weather, water in early stage to get plants going. 1/2 to 1 per week if soil is very dry
Parsnips Before soil gets bone-dry 1 per week in early stages
Peas When flowers form and during pod-forming and picking 2 per week
Potatoes When the size of marbles 2 per week
Squash Water frequently for best crop. 1 per week
Tomatoes For 3 to 4 weeks after transplanting and when flowers and fruit form 1 gallon twice a week or more
Needs a lot of water during dry spells. Needs water at critical stages of development. Does not need frequent watering.
(compliments Farmer’s Almanac)
How Much Water is Enough?
Prune flowering shrubs, such as rhododendrons, lilacs, and azaleas, after they bloom.
Fertilize your vegetable plants 1 month after they emerge by side dressing.
Be sure to continuously harvest your vegetables and fruit to keep the crops thinned out.
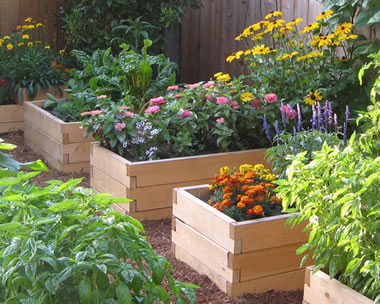
Ensure that raised beds are getting enough water. Once the soil surface dries out, water deeply in the early morning.
Make trellises or supports for tomatoes, cucumbers, and pole beans.
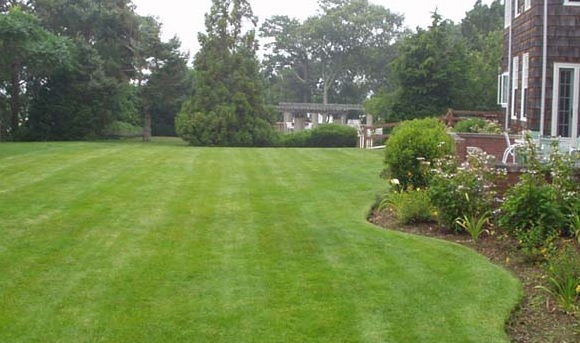
Remember to water your lawn. It is better to water it deeply and less frequently than shallow and more frequently.
Keep checking your plants for any diseases or insects, and treat when necessary.
Stay on top of garden weeds.
Move your houseplants outside for some sunlight. You can also clean and repot your plants.
Mow your lawn regularly to a height of 2 to 3 inches. Leave clippings on lawn as natural fertilizer.
Make sure your lawn is getting 1 inch of water per week. (Measure rainfall by putting out an empty tin can.)
Sharpen your mower blades to prevent disease and keep the lawn greener.
Plant more flowers, such as petunias, marigolds, zinnias, asters, nasturtiums, and impatiens.
Remove the dead flowers from perennials and annuals. Pinching back the stems will also help to keep your plants healthy.
Fertilize annuals with a balanced fertilizer. High nitrogen content is important until the plants are fully grown; once they fully grown, switch to a high-phosphorus fertilizer.
Check your trees and shrubs; ensure that each has a few inches of mulch (or add more).
If your apple and pear trees drop, thin the remainder for more productive harvest.
Spray fruit trees to avoid pests. Horticulture oil sprays handle many pests in an environmentally friendly yet effective way.
Keep your compost pile moist. Mix and moisten dry materials and cover with plastic if dry out.
How to Prepare Garden Soil for Planting?
(Tips from Organic Gardening For Dummies)
Follow these steps when preparing your soil:
- Dig deep.Most plants are content with 6 to 8 inches of good ground for their roots to grow in.If you’re planning to grow substantial root crops (potatoes, say, or carrots), go deeper still — up to a foot or more (yes, you can use a technique called hilling, where you mound up good soil around crops like potatoes, but this method doesn’t excuse your making a shallow vegetable garden).
- Fill ‘er up.Add lots and lots of organic matter! Try using compost, dehydrated cow manure, shredded leaves, well-rotted horse manure (call nearby stables), or a mixture. If your yard happens to be blessed with fertile soil, adding organic matter is less crucial, but most soils can stand the improvement. Mix it with the native soil, 50-50, or even more liberally.
Maybe your area’s soil is notoriously acidic, or very sandy, or quite obviously lousy for plant growth. The good news is that organic matter can be like a magic bullet in that it helps improve whatever you add it to. You have to replenish the organic matter at the start of every growing season or maybe even more often. (If the soil stubbornly resists improvement, resort to setting raised beds atop it and filling these bottomless boxes with excellent, organically rich soil)
Repair Lawn
1. ADD LIME TO YOUR LAWN. Liming sweetens the soil and encourages good grass growth at the same time as discouraging moss.Because local soils are generally more acidic, liming your lawn will raise the PH levels, making it easier for the grass to grow at the same time as discouraging moss growth.
2. MOSS CONTROL. Ferrous sulphate should be applied to the lawn to kill the moss. Moss growth is usually a combination of acidic soil conditions, pact soil with poor drainage and shade.
3.RAKE OR DE-THATCH. This will help remove dead moss and thatch from your lawn.
4. AERATION. Aeration will allow proper drainage and root development. Areation should be done every two to three years. This procedure removes cores of soil to allow the lawn roots and soil to breathe and moisture to drain.
5. TOP DRESS. Top dressing the lawn with a quarter to half inch of either course sand enables the air and moisture to pass through.
6.OVER-SEEDING. Top dress lawn with quarter inch of soil with an over-seeder lawn mix. . This will help maintain a moist enviroment for the seed to germinate and encourage growth
CEDAR TREES – Suggested Planting and Care
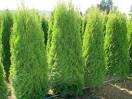
You can plant cedars at most times of year although the best is early spring, or fall when the plant is dormant.
SOIL PREPARATION
Cedars prefer a soil pH of 6 to 6.5, but will grow well in soils up to 7.5. Soils that are too acidic can result in nutrient deficiency symptoms(browning or yellowing of foliage) and eventual tree decline. Make sure you have good soil with proper drainage as good drainage is essential for cedars. Cedars like lots of water but do not like to sit in it.
One can amend the existing soil with organic material. Use 2/3 native soil (soil from the planting hole) and 1/3 new organic material. If the soil does not drain well (i.e. clay or hard packed) you may want to raise the planting bed/mound slightly.
LOCATION
Cedars do best in full sun to partial shade. If cedars are planted under and an overhanging tree or between two houses, they will gradually decline, eventually becoming bare and dead. When planting cedars you should, avoid times of very hot temperatures if possible, hot summer weather may cause the root ball to dry out during transport. It is best to plant these new hedges in cool weather to insure the roots stay moist.
PLANTING
Dig a hole at least twice the size of the root ball and loosen the soil for the new roots to penetrate. This is also a good time to incorporate soil amendments (see “Soil Preparation” above). The planting hole should be no deeper than the soil level of the plant. Planting too deep will smother the roots and deprive them of oxygen.
WATERING
Cedars are relatively shallow-rooted trees. They are susceptible to drought stress especially in sandy soils. The extreme of very wet conditions in the fall and winter, followed by a hot, dry summer, is very stressful for the roots. Hedges should be watered during very dry periods. Mulching will also help to maintain even soil moisture and temperature. Prolonged flooding and over-watering can also cause root death from lack of oxygen in the soil. Water can accumulate under hedges that are planted downhill from watered lawns. Watering with sprinklers that are timed to go on at short intervals every day will keep the soil continually wet and promote shallow rooting, which is not desirable. It is preferable to water deeply for about 30-40 minutes, 2 or 3 times per week. In some cases there are some physiological effects that will occur even though all care has been taken to plant the hedge correctly. If only a few branches have died out in patches along the hedge in summer, this may be natural cedar flagging. It is very common on Western Red cedar. Flagging may be more severe in hot, dry weather but is not considered harmful to the tree. The foliage may take on a bronze to reddish brown to black colour in cold winters. This is natural and the trees will green up as the growing season progresses. A few varieties have a natural bronze or blue tinge in certain seasons.

Hours:
Open Weekends & Holidays!
Mon – Fri: 8am to 6:00pm
Saturday: 8am to 6:00pm
Sunday: 9am to 5pm
Holidays: 10am to 2pm
Hours of operation are subject to change without notice, please call to confirm.
Contact Information
- 7085 Bridge Street
Mission, BC V2V 2X5 - Phone: (604) 826 1600
- E-mail: globallandscape@telus.net
Contact Us Today!
Servicing Fraser Valley & Lower Mainland BC:
Mission, Abbotsford, Matsqui, Langley, Surrey, Vancouver, White Rock, Chilliwack, Coquitlam, Port Coquitlam, New Westminster, Richmond, Delta, Cloverdale, Burnaby and other areas of British Columbia.


